Bircher Muesli

image

A few of the hotels we stayed at during our honeymoon in Thailand offered Bircher Muesli as part of their breakfast buffets. I became a little infatuated with this delicious but healthy oatmeal alternative, made with overnight oats, orange juice, yogurt, milk and other delicious toppings,  and would eat a cup every morning. I researched it and found recipes I liked while I was still on my honeymoon and couldn’t wait to come home and make a batch of my own.

image

Ingredients (as seen above)

  • 1 1/2 cup oats (old fashioned, not quick cooking)
  • 7-8 tbsp orange juice
  • 1/2 cup of plain greek yogurt
  • 3/4 cup milk (non fat or regular)
  • 1/4 cup coconut milk ( you can just substitute with regular milk if you don’t have coconut milk)
  • 1/4 cup of water
  • 3-4 tbsp raisens
  • 4-5 tbsp walnuts, sliced almonds or other nuts
  • 1/2 cup shredded coconut
  • 1/4 tsp cinnamon
  • honey as needed to sweeten

Instructions

  • Add all of the ingredients in a bowl, mix well. Cover and refrigerate overnight.
  • Add honey as needed when serving along with additional toppings  like fresh fruit.
  • If the mixture is too thick, add more milk or water until the desired consistency is achieved.

image

image
image
image

The mixture becomes incredibly creamy overnight, the oats soften, the raisins plump up, the coconut almost melts away in the milk and yogurt and the orange juice adds a dash of extra sweetness. I really like this with nuts as they add some texture and crunch. The best part, muesli is technically a breakfast food but it tastes so good you can eat it anytime of the day and can easily sub it in for dessert.

Pavlovas

image

I found myself with a few extra egg whites after this recipe, and decided to make pavlovas. Pavlovas are meringue-based dessert named after the Russian ballet dancer Anna Pavlova. They have a crisp crust and soft, light inside and are tyically served with fruit or whipped cream.This tasty dessert is relatively easy to make and requires only a handful of ingredients. Make sure you eat them within 24 hours otherwise they will become very chewy and lose their delicious texture.

What you’ll need:

  • 1 1/2 teaspoons pure vanilla extract
  • 2 teaspoons white wine vinegar
  • 1 1/2 Tbsp cornstarch
  • 1 cup granulated sugar
  • 3/4 cup (6 ounces, about 6) large egg whites, preferably room temperature
  • Pinch of salt

What to do:

Preheat the oven to 275°. Line a large baking sheet with parchment paper. Pour the vanilla and vinegar into a cup. Stir the cornstarch into the sugar in a small bowl. In a large bowl of a heavy-duty mixer, fitted with whisk attachment, whip egg whites and salt, until soft peaks start to become visible, approximately 2 to 3 minutes. Increase speed to medium-high, slowly and gradually add the sugar-cornstarch mixture. A few minutes after these dry ingredients are added, slowly pour in the vanilla and vinegar. Increase speed and whip until meringue is glossy, and stiff peaks form when the whisk is lifted.

image

Spoon the meringue into round mounds on a baking sheet lined with parchment paper. With the back of a spoon, create an indentation in the middle of the mound for holding the filling once meringue is baked.

image

Place baking sheet in the oven.Reduce oven temperature to 250°F. Bake for 50-60 minutes, or until the meringues are crisp, dry to the touch on the outside, and white, not tan-colored or cracked. The interiors should have a marshmallow-like consistency. Check on meringues at least once during the baking time. If they appear to be taking on color or cracking, reduce temperature 25 degrees, and turn pan around.

image

Once ready, lift from the baking sheet and cool on a wire rack. They will crack a bit in the middle but since you will fill them up, that’s ok.

image

Serve topped with your favorite filling – fresh fruit, lemon curd, raspberry or blueberry sauce, or freshly whipped cream.

image

Vanilla Bean Ice Cream

image

A few days ago I made these sea salt caramel brownies and then decided they’d go perfectly with a nice scoop of vanilla bean ice cream. I used a simple recipe egg-custard recipe and some of my own vanilla extract to create this easy dessert. 

What you’ll need: 

  • 1 cup heavy cream
  • 1 cup half-and-half
  • 1 cup milk 
  • 2/3 cup granulated sugar
  • 2 vanilla beans, split lengthwise and scraped, 
  • 2 tablespoons of vanilla extract 
  • 6 large egg yolks

What to do: 

Combine cream, half-and-half, vanilla extract, vanilla beans and seeds in a medium saucepan and bring to a simmer over medium heat. Once it begins to boil, remove from heat, cover and allow it to steep for about 15 minutes. 

image

Meanwhile, whisk egg yolks and sugar in a second large bowl until smooth and fluffy. It should have a light yellow color.  

image

Add cream mixture from heat and slowly pour about 1 cup into the egg yolk mixture, whisking constantly until smooth. Add the rest of the cream slowly, while continuing to whisk (on low) the mixture. Pour cream-egg mixture back into the pan and cook over low heat, stirring constantly, until custard coats the spoon, about 2 minutes. Make sure to not over-cook. 

Remove custard from heat and strain through a fine-mesh strainer into a bowl, scraping as much vanilla bean through the strainer as possible. Allow the mixture to cool to room temperature, about 10 to 15 minutes. Then cover and place in the refrigerator to chill completely, at least 3 hours. Your mixture should be completely chilled before you add it to your ice cream maker. Once chilled, use your ice cream maker according to the manufacturer’s instructions then freeze overnight and serve.

image

This light and creamy ice cream is the perfect addition to a warm brownie, can be served with one of these delectable chocolate chip cookies or scooped on top of this bourbon peach cobbler. 

image

Butterless Alfredo Sauce

image

Alfredo sauce is definitely one of those recipes that usually comes with thousands of calories and a ton of the good stuff: butter and cheese. When I first started making this dish, I had no intention of changing that but eventually had to make a few substitutions when I realized I didn’t have any butter… or Parmesan cheese.  The end result was far more delicious than I had hoped, a creamy, flavorful sauce that perfectly complimented the fresh tagliatelle I had on hand.

Heat a medium to large saute pan over medium heat and add 2 tbsp of  olive oil and 3 cloves of garlic, chopped. Stir quickly and cook until the garlic is lightly golden. Next, reduce heat slightly and add 2 Tbsp flour and whisk to combine. Cook for about a minute.

image

Add 1 cup of water and 3/4 cup of milk. Use a flat spatula to mash the flour into the liquid. Once the mixture has thickened, add pesto, salt and pepper.

image

If you have Parmesan this is when you would use it, but I didn’t have any so I substituted with Kashkaval cheese, which is a hard yellow cheese made from sheep’s milk that is very popular in Albania. I brought back a few pounds of it after my last visit there this summer. Yes, you read that correctly, I brought back cheese. Why? Because why not? Anyway, on to the recipe. Add half a cup of cheese to your sauce and stir until it melts.

image

Delicious. If your sauce is too thick, add a bit more water. If it’s too thin, add more flour. Make sure to mix well throughout so you end up with a lumpy sauce.

image

Add a cup of frozen peas. You can add more if you prefer.

image

Mix them in and allow to cook for about 2 minutes. Season with more salt and pepper if necessary. You can also add about a bit of half and half for that extra creamy texture.

image

Add in your cooked pasta and toss well to combine.

image

Then serve!

What you’ll need:

  • 2 Tbsp olive oil
  • 3 Cloves of garlic
  • 2 Tbsp all purpose flour
  • 3/4 Cup of milk
  • 1 Cup of water
  • 1 Tbsp. pesto
  • 1/2 Cup grated Parmesan (or any other type of hard cheese) grated
  • 1 Cup frozen green peas
  • Optional 2 Tbsp half-half
  • Pasta of your choice
  • Salt and pepper to taste

What to do:

Cook pasta according to package instructions. Heat a large saute pan over medium heat. Add olive oil and garlic. Stir quickly and cook until the garlic is lightly golden. Next, reduce heat slightly and add 2 Tbsp flour and whisk to combine. Cook for about a minute. Add 1 cup of water and 3/4 cup of milk. Use a flat spatula to mash the flour into the liquid. Once the mixture has thickened, add pesto, cheese, salt and pepper.

Add more water or flour to achieve the desired consistency of your sauce. Once it’s ready, add the peas and stir. Then add the cooked pasta and toss to combine.

Enjoy!

Cauliflower and chicken soup

image

I’ve been craving soup almost every single day this week and finally made a batch of delicious, hearty, warm and creamy cauliflower soup. Now if you’re not a fan of cauliflower, don’t scratch this recipe off your list. The truth is you can barely taste it, while still enjoying its creamy texture. If you prefer, you can also substitute white potatoes for cauliflower. I had a hard time choosing between chicken soup and a creamy soup, so I basically combined everything and made creamy cauliflower soup with chicken. It was a hit!

image

Wash and chop one or two cauliflower heads, depending on their size and your love for the vegetable.

image

Roughly chop one or two carrots and one small white onion.

image

Place a stock pot or dutch oven over medium high heat and melt 4 tablespoons butter. Add the onions when the butter is melted. Some carrots escaped me as you can see, but we don’t have to be meticulous all the time.

image

Once your onions have cooked for about 2 minutes, add the carrots. Let them cook for another minute or so.

image

Add the cauliflower. I did a rough chop on mine because I wanted my soup to be both creamy and chunky.

image

Add 2 tablespoons of fresh or dried parsley. Mix it all together, reduce the heat to low and let it simmer for about 15 minutes. 

image

In a separate pot, boil 2-3 chicken breasts. Roughly chop when it’s done and add to the soup. Add 8 cups of chicken stock or broth.

image

Bring to a boil over medium heat, then reduce heat and let the soup simmer.

image

Then bend down and pet your dog because she is ridiculously adorable and has been cooking with you for about 30 minutes. While you’re at it, give her a nice treat.

image

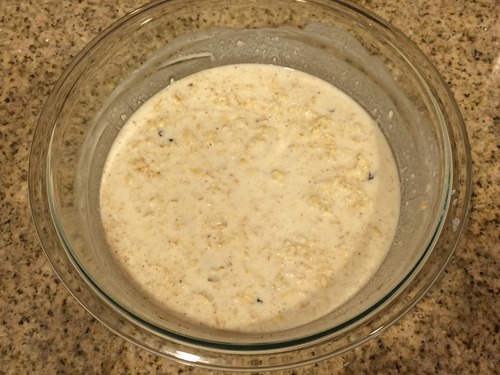
Melt 2 tablespoons of butter in a pot. In a small container, combine 2 cups of whole milk and 6 tablespoons of all-purpose flower. Once it’s thoroughly mixed, add it to the melted butter. The cream sauce should start thickening.

image

Then add one cup of half and half, because everything is better with some half and half in it.

image

Add the cream sauce to your soup.

image

Mix it well.

image

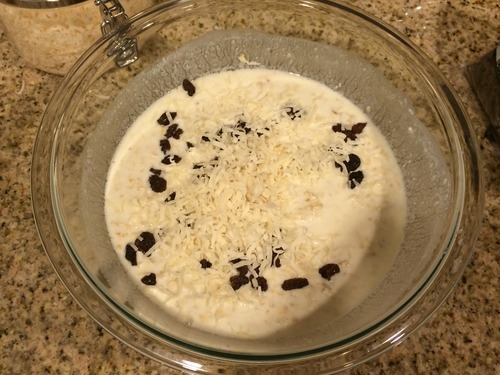
Add a few bay leaves – see half and half reasoning above and allow it to simmer for another 15-20 minutes.

image

Then because this soup wants a little extra something, add a tablespoon of sour cream in your bowl, then add your soup.

image

Add about a teaspoon of fresh ground nutmeg. This makes all the difference, don’t skip it.

What you’ll need:

  • 2 cauliflower heads
  • 2 carrots
  • 1 small white onion
  • 6 Tablespoons of Butter, divided
  • 2 Tablespoons Fresh Or Dried Parsley
  • 2-3 chicken breasts, boiled
  • 4 cups Chicken Broth Or Stock
  • 6 Tablespoons All-purpose Flour
  • 2 cups Whole Milk
  • 1 cup Half-and-half
  • 1 tablespoon of sour cream, per serving
  • fresh nutmeg to taste
  • salt and pepper to taste

What to do:

Wash and chop one or two cauliflower heads, depending on their size and your love for the vegetable. Roughly chop one or two carrots and one small white onion. Place a stock pot or dutch oven over medium high heat and melt 4 tablespoons butter. Add the onions when the butter is melted. Some carrots escaped me as you can see, but we don’t have to be meticulous all the time. Once your onions have cooked for about 2 minutes, add the carrots. Let them cook for another minute or so. Add the cauliflower and 2 tablespoons of parsley. Mix it all together, reduce the heat to low and let it simmer for about 15 minutes. 

In a separate pot, boil 2-3 chicken breasts. Roughly chop it when done and add to the soup. Add 8 cups of chicken stock or broth. Bring to a boil over medium heat, then reduce heat and let the soup simmer.

Melt 2 tablespoons of butter in a stock pot. In a small container, combine 2 cups of whole milk and 6 tablespoons of all-purpose flower. Once it’s thoroughly mixed, add it to the melted butter. The cream sauce should start thickening. Add one cup of half and half and whisk to mix it together. Add the cream sauce and bay leaves. Mix well and let it simmer for another 15-20 minutes. Add salt and pepper to taste. Serve soup over one tablespoon of sour cream and add fresh nutmeg to taste.

Enjoy!

Floral Headpieces

Wedding hair styles and accessories have really changed over the last few years, from traditional tiaras, to elegantly accessorized ballerina buns, messy up-dos accentuated by delicate buds, intricate braids and simple hair enhanced by gorgeous floral crowns. Having fresh flowers as part of centerpieces and bouquets is typically a must for every bride, but the new floral headpiece trend, takes the fresh flower idea to the next level. Below are a few stunning examples of this new bridal fashion accessory as worn by the bride, bridesmaids, flower girls and even the most loved four-legged member of your family. What do you think of this style? Would you incorporate for your special day?  

Bride

image

image

image

Bridesmaids

image

image

image

image

Flower Girls

image

image

image

image

Dogs

image

image

image

All Images are from Pinterest

Zio Ristorante

Image Courtesy of Zio Ristorante

Some time ago, I went out to dinner at Zio Ristorante with my fiancé. Located in the meatpacking district, Zio is a charming and welcoming restaurant, with warm décor, high ceilings, a grand entrance and spacious rooms. The staff and the service they provide is impeccable and one of the best I’ve encountered in New York. The kitchen is open so if your seat position allows it, you can watch the chefs at work. Did I mention the reason we went here is because I found out Anthony Bourdain dined here with his wife. Sal and I are both incredible fans of his and even took a trip up to Montreal this summer inspired by an episode of Parts Unknown.  So in our family, if it’s good enough for Anthony, it’s good enough for us (except for blood sausage, I wouldn’t eat that).

Back to our experience at Zio, after we were seated our waiter brought a fresh bread basket and a small dish of red pesto, a mixture of sundried tomatoes, olive oil and seasonings. It was delicious and gone in less than 3 minutes. As a side note – there seem to be a lot of those in this post – I’ve noticed that most restaurants, especially the Italian establishments, have stopped bringing bread and olive oil to the table as a starter. I’m not sure why this is happening, but I’m definitely not a fan of it. It’s always ideal to munch on something warm and tasty while you peruse the menu.

As an appetizer Sal and I shared the Riso Al Salto con L’osso – a crunchy saffron risotto cake, bone marrow and gremolada sauce. Absolutely exquisite! Sal hates bone marrow which meant there was more for me. It was juicy, fatty, and succulent, everything you could ever want bone marrow to be. Extra perk, the waiter was kind enough the wrap the bone for us to take home to Khaleesi (our little pup) who loved it as much as her mama did!

Image courtesy of Zio Ristorante

For entrees we shared the Agnello (for me) and the Branzino Selvatico (for him). The Agnello consisted of almond crusted rack of lamb, Swiss chard ravioli in a goat cheese & sage fondue sauce. As a girl who thinks ravioli should be served with every dish, I found this pairing to be amazing! The ravioli- soft and flavorful, was served in a creamy sauce with an earthy, meaty aftertaste. The lamb chops were perfectly cooked, crunchy and salty on the outside, but soft and tender on the inside.  

The branzino was fresh and delicious. I had never tried the artichoke caponata before- a blend of kalamata olives and artichokes served with olive oil and garlic- but definitely enjoyed it. Sal loves artichokes like I love bone marrow, so he had a major R-rated experience with the caponata.

For dessert we ordered the Tiramisu and the chef’s special, the Amaretto Crème brûlée.They were both good but the crème brûlée was superb, divine, mouthwatering, and all other words you can use to describe something delectable. With every bite I took I got sadder and sadder because I knew I was closer to the end. If you go and have to choose just one dessert, ask if they’re serving this and have some. You’re welcome! Definitely make some time to stop by this gem. I think good Italian restaurants are hard to find, even in this city and this place is definitely one of the better choices. Now they’re even on Seamless Web, so  you can order the Agnello from your computer… in fact maybe that’s what I’ll have for lunch today.

Best Chocolate Chip Cookies

image

You’ve probably seen this recipe a few times on Pinterest as it’s definitely a favorite among bakers and cookie lovers. And after finally giving it a try a few weeks ago I know why. The raves are true, these are indeed the best ever chocolate chip cookies. They’re soft, chewy in the middle with a bit of crisp on the outside edges, a good size and filled with decadent mouth-watering chocolate. All that taste comes at a price, as the recipe requires you to refrigerate the dough for 36 hours, so plan to make these in advance. They also store really well and considering you’ll be able to make around 30-40 cookies with this batch, that’s a good thing. I would definitely recommend that you make these with the recommended chocolate disks ( 60 percent cacao) as they taste much better. I made a small batch with regular chocolate chips and they were delicious, but the chocolate was not oozing out of every bite the way it did with the disks. So if you’re going to make them, invest in some good chocolate and stock up on both cake and bread flour, which is the combination that makes these cookies so irresistible. Side note, if you’re a fan of cookie dough, this is also the best cookie dough I’ve ever tasted. I’m pretty sure I ate enough of it to make 4 cookies, probably not the best idea but it had to be done. 

image

image

Even Khalessi wanted in on the action 

image

Classic Tres Leches Cake

image

My mom loves my tres leches cake. It’s her all-time favorite. She requests it for birthdays, holidays, general hang-out days, basically any time I can make it. Considering she is the makes of all my favorite dishes, it’s a great pleasure to know one of my own, is her favorite as well. For Mother’s Day, I knew I had to make it and after the hearty beef bourguignon, this light and airy cake was the perfect dessert.

What you’ll need:

1 cup All-purpose Flour

1-1/2 teaspoon Baking Powder

1/4 teaspoon Salt

5 whole Eggs

1 cup Sugar, Divided

1 teaspoon Vanilla

1/3 cup Milk

1 can Evaporated Milk

1 can Sweetened, Condensed Milk

1/4 cup Heavy Cream

What to do:

Preheat oven to 350 degrees. Spray your pan liberally until coated. I choose a round pan this time, because I was only making it for 5 of us. But you can choose a larger, square pan if you’re making this for more people.

Combine flour, baking powder, and salt in a large bowl. Separate eggs. Beat egg yolks with 3/4 cup sugar on high speed until yolks are pale yellow.

image

image

Stir in milk and vanilla. Pour egg yolk mixture over the flour mixture and stir very gently until combined.

image

image

image

Beat egg whites on high speed until soft peaks form. With the mixer on, pour in remaining 1/4 cup sugar and beat until egg whites are stiff but not dry.

image

Fold egg white mixture into the batter very gently until just combined. Pour into prepared pan and spread to even out the surface.

image

image

Bake for 35 to 45 minutes or until a toothpick comes out clean. Turn cake out onto a rimmed platter and allow to cool.

image

Combine condensed milk, evaporated milk, and heavy cream in a small pitcher. When cake is cool, pierce the surface with a fork several times. Slowly drizzle all the milk mixture and make sure to get the edges of the cake as well. Allow the cake to absorb the milk mixture for 30 minutes.

image

Many people ice the cake, but my mom is not a fan of the whipped cream topping so I usually skip it. If you’d like to ice it however, whip 1 pint heavy cream with 3 tablespoons of sugar until thick and spreadable. Spread over the surface of the cake, and then serve yourself a piece…or two. Have you tried tres leches cake?

Beef Bourguignon for Mother’s Day Dinner

image

This year for Mother’s Day I decided to cook dinner. I made beef bourguignon, a dish that had been on my “must cook” list for over a year. Having recently purchased the Le Creuset Dutch Oven, I thought this would be the perfect opportunity and the perfect dish, to christen it with. It turned out absolutely perfect, delicious, rich and inviting.

What you’ll need

1 tablespoon olive oil
8 ounces apple wood bacon, diced
2 1/2 pounds chuck beef cut into 1-inch cubes
Kosher salt
Freshly ground black pepper
1 pound carrots, sliced into chunks
2 yellow onions, sliced
2 teaspoons chopped garlic
1/2 cup Cognac
1 (750 ml.) bottle dry red wine like Pinot Noir
2 cups beef broth
1 tablespoon tomato paste
1 teaspoon fresh thyme leaves or 1/2 teaspoon dried
4 tablespoons unsalted butter at room temperature, divided
3 tablespoons all-purpose flour
1 pound frozen whole onions
1 pound fresh mushrooms, thickly sliced

What to do:

Preheat the oven to 250 degrees F. Heat the olive oil in a large Dutch oven. Add the bacon and cook over medium heat until it’s lightly browned. Remove the bacon with a slotted spoon to a large plate.

image

Dry the beef cubes with paper towels and then sprinkle them with salt and pepper. Sear the beef in the hot oil for 3 to 5 minutes, turning to brown on all sides. Remove the seared cubes to the plate with the bacon and continue searing until all the beef is browned. Set aside.

image

image

Toss the carrots, and onions, 1 tablespoon of salt and 2 teaspoons of pepper in the fat in the pan and cook until the onions are lightly browned. Add the garlic and cook for 1 more minute. Add the Cognac, stand back, and ignite with a match to burn off the alcohol.

image

image

image

Put the meat and bacon back into the pot with the juices. Add the bottle of wine plus enough beef broth to almost cover the meat. Add the tomato paste and thyme. Bring to a simmer, cover the pot with a tight-fitting lid and place it in the oven for about 1 1/4 hours or until the meat and vegetables are very tender when pierced with a fork.

image

Once you’ve removed from the oven, combine 2 tablespoons of butter and the flour with a fork and stir into the stew. Add the frozen onions. Sauté the mushrooms in 2 tablespoons of butter for 10 minutes until lightly browned and then add to the stew. Bring the stew to a boil on top of the stove, then lower the heat and simmer for 15 minutes. Season to taste.

image

Serve with toasted country bread or homemade mashed potatoes. This dish can be a little intimidating – or at least it was for me, but if you have the time and patience for it, it can truly be a treat. Even better, my mom really loved it and for once she wasn’t the one cooking for hours and doing the dishes! Hope you all had a wonderful Mother’s Day as well!